
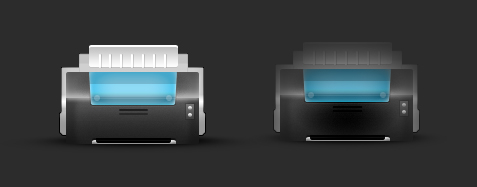
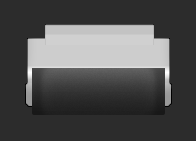
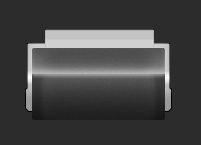
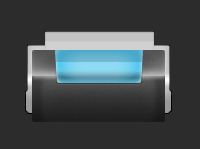
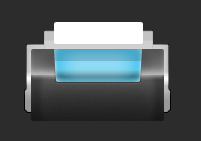
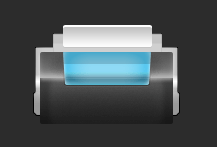
Preview:
Stylish Printer Design.
Step 1:
Let’s start out by creating a new file. I used a 400×400 pixels canvas set at 72dpi, and I filled my background with #2C2C2C color shade. Make a new layer set and name it 'Stylish Printer Design'.
In a new layer draw a gray rectangle with #CDCDCD color shade and 143 x 69 px dimensions. Now select the Rounded Rectangle Tool and set the radius setting to 4 px. Then draw a longer gray rounded rectangle on the bottom of the rectangle so the bottom part sticks out a little.

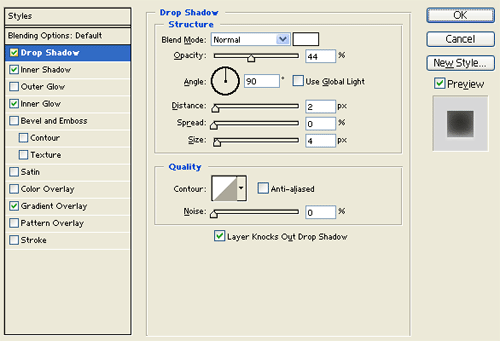
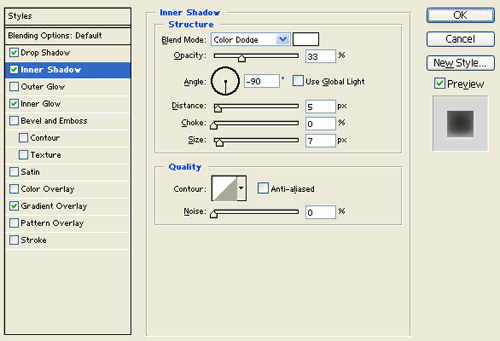
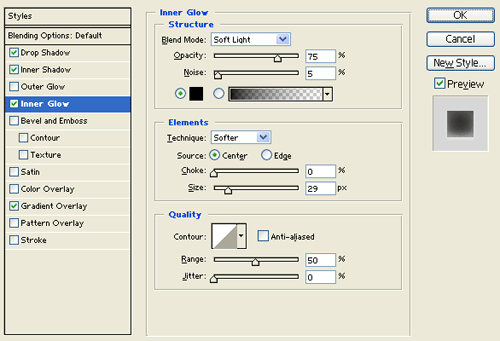
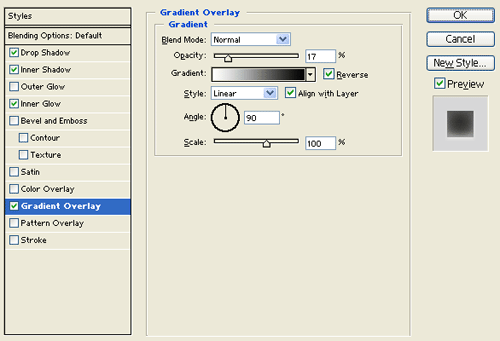
Step 2:
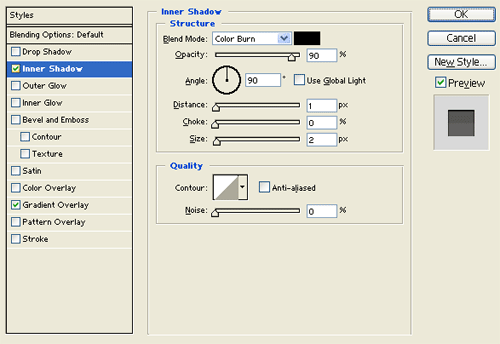
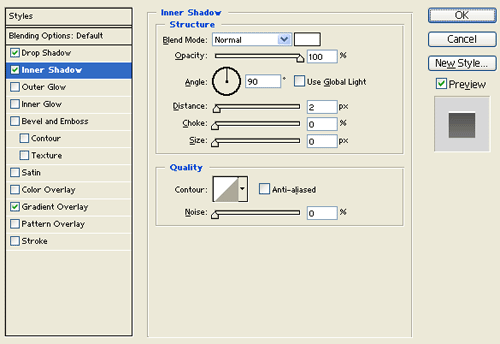
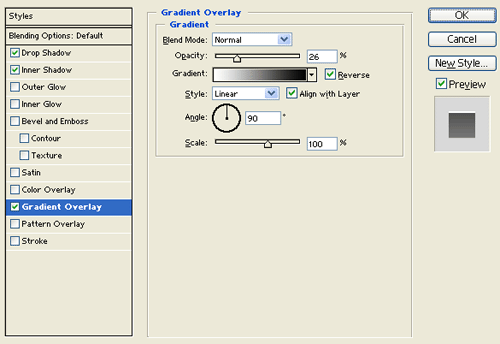
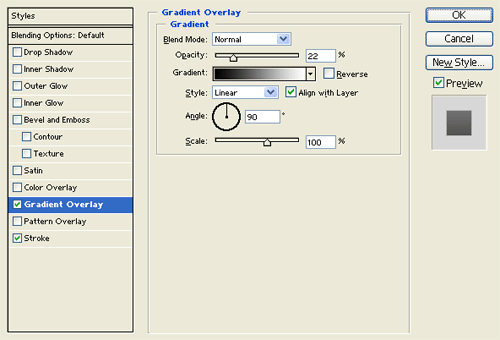
Under Layer Style(Layer > Layer Style) add an Inner Shadow, Inner Glow and Gradient Overlay blending options to your gray shape rectangle layer.
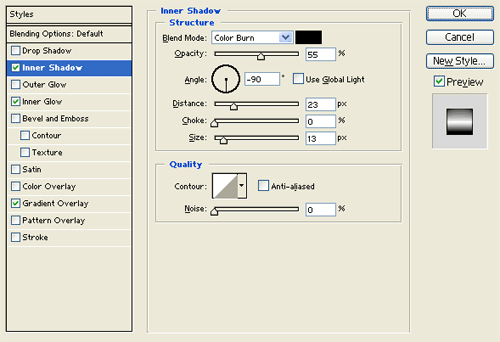
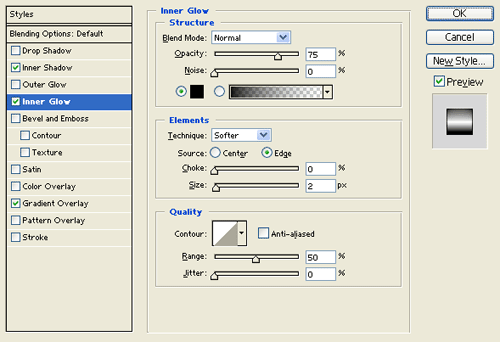

Result:
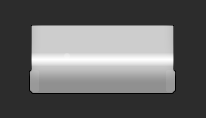
Step 3:
In a new layer draw a small gray rectangle with 109 x 21 px dimensions on top of the gray shape rectangle design. Then under Layer Style(Layer > Layer Style) add an Inner Shadow and Gradient Overlay blending options.

Result:
Step 4:
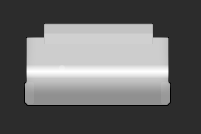
Create a new layer then draw a dark gray rectangle with #646464 color shade and 133 x 47 px dimensions on the bottom side of the printer design.
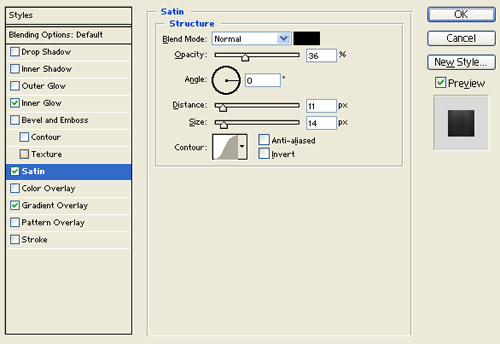
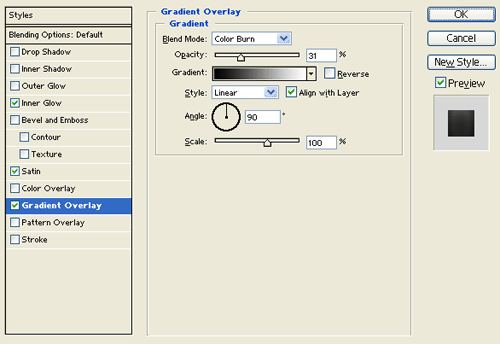
Step 5:
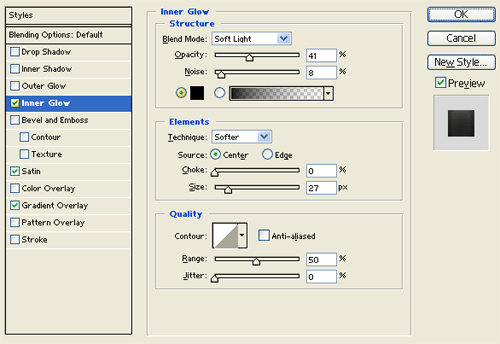
Under Layer Style(Layer > Layer Style) add an Inner Glow, Satin and Gradient Overlay blending options to your dark gray rectangle layer.
Result:
Step 6:
Create a new layer. Above the first dark gray rectangle, add another dark gray rectangle with 133 x 26 px dimensions.
Step 7:
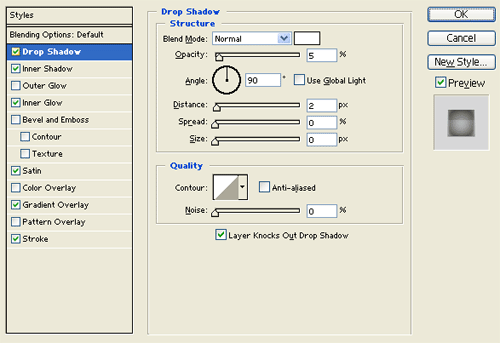
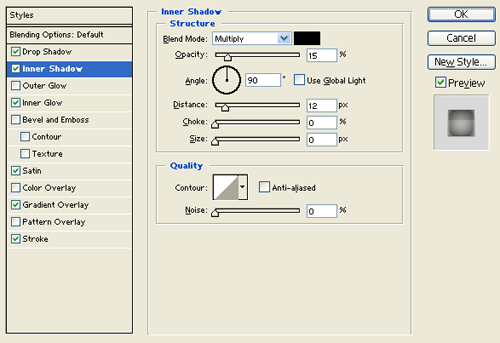
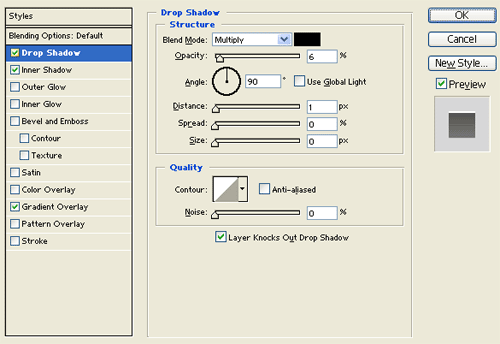
Under Layer Style(Layer > Layer Style) add a Drop Shadow, Inner Shadow, Inner Glow and Gradient Overlay blending options to your second dark gray rectangle layer.
Result:
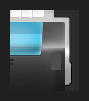
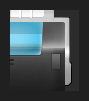
Step 8:
In a new layer draw an aqua colored rectangle with #52C6EF color shade and 88 x 33 px dimensions. Then slightly slant the rectangle through Edit > Transform > Perspective.
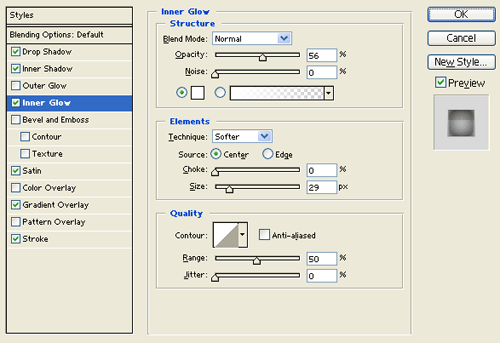
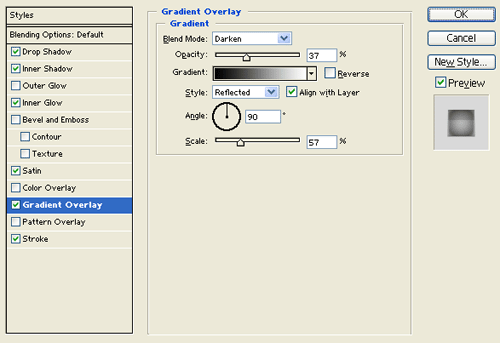
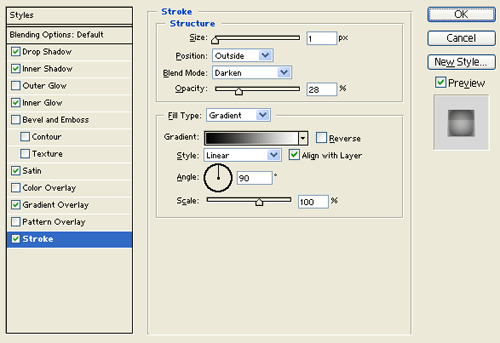
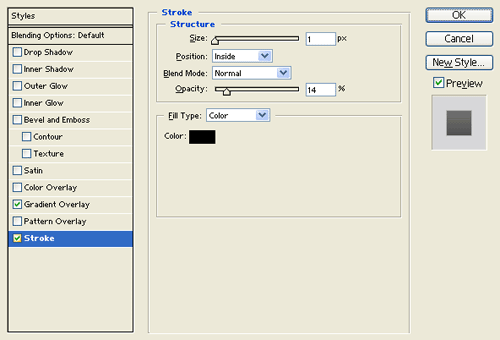
Step 9:
Under Layer Style(Layer > Layer Style) add a Drop Shadow, Inner Shadow, Inner Glow, Satin, Gradient Overlay and Stroke blending options to the slanted aqua rectangle layer.

Result:
Step 10:
In a new layer draw a white rectangle with 89 x 22 px dimensions just above the slanted aqua rectangle design.
Step 11:
Under Layer Style(Layer > Layer Style) add a Drop Shadow, Inner Shadow and Gradient Overlay blending options to your white rectangle layer.
Result:
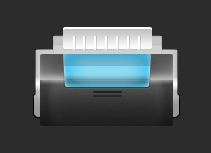
Step 12:
Create a new layer then draw a 2 px white line on the white rectangle design. Then draw a 1 px gray line with #C0C0C0 color shade next to the white line.

Step 13:
Duplicate the line layer and create the pattern shown below on the white rectangle design. Then create a new layer and draw two small rectangles with #202020 color shade just below the slanted rectangle design.
Step 14:
Create a new layer then draw a small dark gray rectangle with #4E4E4E color shade and 10 x 17 px dimensions on the right side of the printer design.
Step 15:
Under Layer Style(Layer > Layer Style) add a Gradient Overlay and Stroke blending options to the small dark gray rectangle layer.
Result:
Step 16:
In a new layer draw two small white circles on the small rectangle design.

Step 17:
Create a new layer, on the bottom end of the printer design add a white rounded rectangle with 84 x 12 px dimensions. Then cut the bottom half of the rounded rectangle. Now make a black rounded rectangle with a shorter width on the same spot as the white rounded rectangle. Finish it off by cutting the top half of the black rounded rectangle.
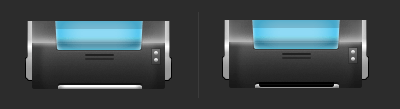
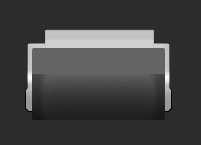
Results:
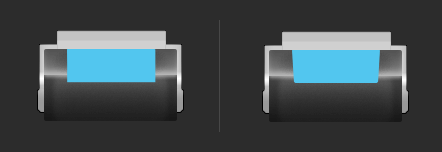
Stylish Printer Design.