Preview:
Cut out Jeans Text Effect.

Step 1:
Let’s start out by creating a new file. I used a 700×700 pixels canvas set at 72dpi, and a black background. Now make a new layer set and name it 'Cut out Jeans Text Effect'. Then select the Horizontal Type Tool, set the font family to Arial, Bold, 110 pt, smooth and #0A3167 color shade. In a new text layer type your name.

Step 2:
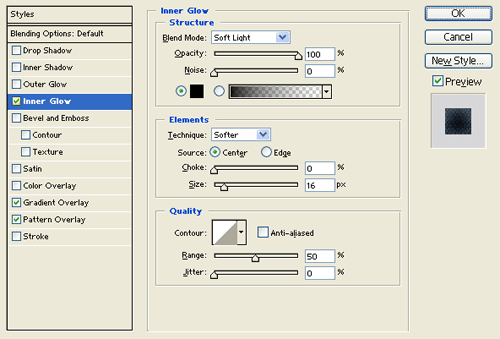
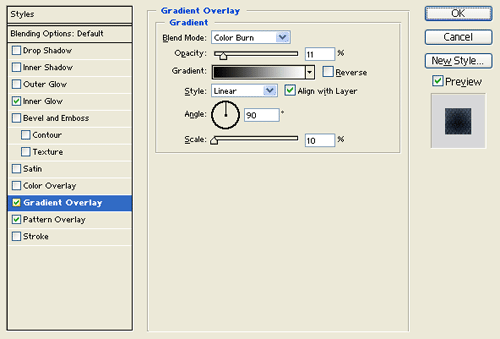
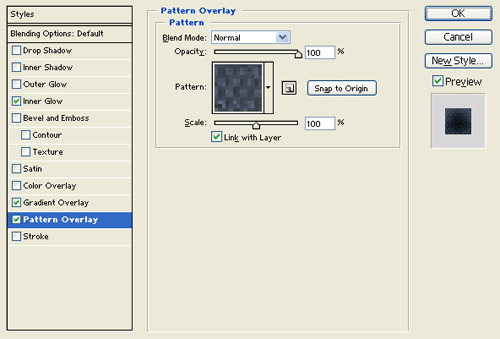
Under Layer Style(Layer > Layer Style) add an Inner Glow, Gradient Overlay and Pattern Overlay blending options to your blue text layer.


Pattern:


Result:

Step 3:
Add a marquee selection around your text through Select > Load Selection. Then go back to Select > Modify > Contract, contract by 1 px. Now take a screen shot of your canvas with the marquee selection around the text and paste the screen shot into a new canvas. Cut out the text design with the marquee selection and insert into your original canvas with the original text design.

Step 4:
Set the text design with the marquee selection layer's blending mode to Color Dodge at 55% opacity level.

Step 5:
Merge your 'Cut out Jeans Text Effect' layer set through Layer > Merge Layer Set. Then use the Polygonal Lasso Tool to cut out the jeans text design as shown below.

Step 6:
Create a new layer, use a 1 px soft brush and a gray color shade for adding threads on the cut out spaces. Use the sharpen effect through Filter > Sharpen for better results.

Results:
Cut out Jeans Text Effect.

